UI Rework

This week, I’m going to write about the two core components of the game UI. The navigation lights and the child status panel. The navigation lights were added because the feedback from the play testing showed that people were getting lost a lot and needed an easier way to navigate the map. The child status panel was added because the old one was long due for a revamp.

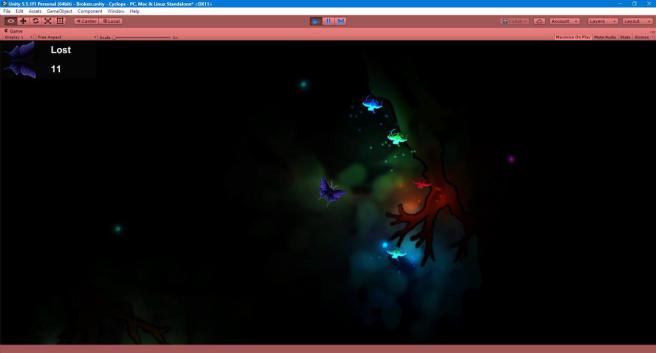
So, to start with, the child status panel. This is what the old UI looked like.

Old UI
Old UI

It was simple, but not very intuitive. Several people complained about it being not obvious what “Lost” stood for and a confusion as to what the icon of the player meant. The new UI replaces this with a child status panel. In it, each of the children and their current status (lost, found, being chased by a hunter or dead) are shown. Here’s a screenshot of the child status panel in action.

New UI
Child Status Panel

The blue light is for found, the black overlay is for lost, the X mark is for dead and the red light is for being chased. The panel was implemented with a bit of a long code. It contains eight images. One each for the children and their status. The script which manages the UI contains four GameObject references to the children and four to the status images (the images for the children remain the same, and hence were not accessed via script). Once this base framework was made, it was just a matter of a few conditional statements to get the right status to display on the right image in the UI. The code for this is not included in the post, as it requires components from some of the other scripts, and is probably not too hard to make.

Next up is the navigation light. The other programmer in the team suggested I use vectors to the children from the player, find the point where it crosses the screen, move the light source there and light it up when using the sonar. I came up with an alternative. I added eight lights around the player, in top, bottom, left, right and the 4 corners of the screen. They are positioned and controlled using a script.

void setPos()
{
navLightTop.transform.position = target.transform.position + new Vector3(0, 3, 0);
navLightBottom.transform.position = target.transform.position + new Vector3(0, -3, 0);
navLightLeft.transform.position = target.transform.position + new Vector3(-6.5f, 0, 0);
navLightRight.transform.position = target.transform.position + new Vector3(6.5f, 0, 0);

navLightTopLeft.transform.position = target.transform.position + new Vector3(-6.5f, 3, 0);
navLightTopRight.transform.position = target.transform.position + new Vector3(6.5f, 3, 0);
navLightBottomLeft.transform.position = target.transform.position + new Vector3(-6.5f, -3, 0);
navLightBottomRight.transform.position = target.transform.position + new Vector3(6.5f, -3, 0);
}
public void lightUp()
{
List<GameObject> children = new List<GameObject>(GameObject.FindGameObjectsWithTag("Child"));
List<GameObject> child = new List<GameObject>();
GameObject nest = GameObject.FindGameObjectWithTag("Nest");

while(children.Count>0)
{
float distance = Vector3.Distance(children[0].transform.position, target.transform.position);
GameObject furthest = children[0];

foreach (GameObject entity in children)
{
if ((Vector3.Distance(entity.transform.position, target.transform.position)) > distance)
{
furthest = entity;
}
}

child.Add(furthest);
children.Remove(furthest);
}

if (child.Count > 0)
{
foreach (GameObject entity in child)
{
if ((Vector3.Distance(entity.transform.position, target.transform.position)) > locatorDistance)
{
activateLight(entity);
}
}
}

if(nest!=null)
{
activateNestLight(nest);
}

}
void activateLight(GameObject child)
{
if (child.transform.position.x > navLightRight.transform.position.x)
{
if (child.transform.position.y > navLightTop.transform.position.y)
{
navLightTopRight.GetComponent<Light>().intensity = 1;
navLightTopRight.GetComponent<Light>().color = child.GetComponent<childMovement>().childColor;
}
else if (child.transform.position.y < navLightBottom.transform.position.y)
{
navLightBottomRight.GetComponent<Light>().intensity = 1;
navLightBottomRight.GetComponent<Light>().color = child.GetComponent<childMovement>().childColor;
}
else
{
navLightRight.GetComponent<Light>().intensity = 1;
navLightRight.GetComponent<Light>().color = child.GetComponent<childMovement>().childColor;
}
}
else if (child.transform.position.x < navLightLeft.transform.position.x) { if (child.transform.position.y > navLightTop.transform.position.y)
{
navLightTopLeft.GetComponent<Light>().intensity = 1;
navLightTopLeft.GetComponent<Light>().color = child.GetComponent<childMovement>().childColor;
}
else if (child.transform.position.y < navLightBottom.transform.position.y)
{
navLightBottomLeft.GetComponent<Light>().intensity = 1;
navLightBottomLeft.GetComponent<Light>().color = child.GetComponent<childMovement>().childColor;
}
else
{
navLightLeft.GetComponent<Light>().intensity = 1;
navLightLeft.GetComponent<Light>().color = child.GetComponent<childMovement>().childColor;
}
}
else
{
if (child.transform.position.y > navLightTop.transform.position.y)
{
navLightTop.GetComponent<Light>().intensity = 1;
navLightTop.GetComponent<Light>().color = child.GetComponent<childMovement>().childColor;
}
else if (child.transform.position.y < navLightBottom.transform.position.y)
{
navLightBottom.GetComponent<Light>().intensity = 1;
navLightBottom.GetComponent<Light>().color = child.GetComponent<childMovement>().childColor;
}
}
}

The script sets the light intensity of all eight light sources to zero at start, and re-positions them around the player in each update. Also, if the intensity is greater than zero, it is decreased each update. The script also contains a function (which is not called from this script directly) which lights up correct navigation lights with the correct color when called. The light up function is called from the script for the sonar, each time the sonar is used. It’s working is as follows. The whole game area is divided into 9 parts as illustrated (area 9 is the camera view).

split
Screen Split-up

If a child is in the 9th section, no lights are lit up. But if it is in any other section, the light on the corresponding part of the screen is lit up. If there are two children in the same section, then the light will show the color of the closer one. An extra functionality was added later on, to show a light towards the nest (where you should get to, to finish the game) once all children are found and it is active. Anyway, here’s a screenshot of the navigation lights in action.

nav lights
Navigation Lights

Of sprite sheets and animations

This week, I’m going to write about my work with sprite sheets and animations. Even though this is more in the line of an artist’s job, I decided to do it because in the end, it turned out to be a numbers game. Plus, we wanted to implement multiple animations on the same sprite, so it required coding.

So why was it a ‘numbers game’. And why the multiple animations. We had three animated objects in the game. The player itself, the hunter enemy (see my post about hunter targeting for details) and a navigation flower. The first trouble we ran into was that Unity does not support animated gifs. Only sprite sheets. So, the gifs made by the artists were unusable. Directly at least. Unity, requires sprite sheets, multiple frames of the gif on the same file. Such as this one.


It is then possible to slice this sheet into multiple individual images in Unity, and turn them into an animation. Here’s when the problems started creeping up. I added a sprite sheet on the hunter and flew there, only to die mysteriously. On close examination, I discovered that I was attacked by a very tiny hunter! The reason? Sprite sheets and idle sprites were of different sizes and the collider was adjusted for the larger idle sprite (and not re-adjusted for the smaller animated one). And Unity has no apparent (if anyone knows, please let me know) ways to re-size the sprites or the sprite sheets. So, easy fix. Change the idle sprite to one of the frames from the animation sprite sheet and adjust the size of both the hunter object and the collider accordingly. Then I added the second animation on the hunter, an aggro animation. In the hunter animator, I added a trigger which changes the animation depending on the value of a boolean variable. The boolean is then changed in the hunter’s code to true or false depending on it’s state. So, I have a hunter with two animations in it. I flew in to test it out, and notice that the hunter shrinks when it starts chasing! Reason? Sprite sheets of the two animations have different pixel counts. This is why it’s a numbers game. So a note to the artists, when making sprites or sprite sheets, BE CONSISTENT. It wasn’t too much work from the animated gifs though. I scaled the image to the same width and a height equal to the height of an individual frame multiplied by the number of frames (so I can fit them all in a single column). Then a small bit of re-arranging in GIMP (GNU Image Manipulation Program, a free software with similar functionality as Photoshop) and I have a sprite sheet! Adding the more precisely sized sheets, I got the hunter to not shrink when it starts chasing (which might be an interesting idea in some cases, but not so in this context).

The player sprite sheet was a lot simpler. There was only one animation. But, due to the weird way it was coded, it has to be facing a particular direction in the sprite for it to fly properly. Also, the center of the sprite has to be properly aligned with the pivot of the moth (did not know how to edit pivots in Unity at that point) for it to rotate correctly. Another two easy fixes. Rotate the frames and add padding on each side to align the pivot and the image’s center.

Finally, the flower. Now this is where things get a bit tricky. I wanted to implement it so that the flower animation only starts playing when the player gets close to it. And, I wanted the animation to not loop. The second one was easy, just a matter of turning the “Loop Time” option off. For the first one, I did a bit of code work. I disabled the animator and added this code segment.

if (Vector3.Distance(target.transform.position, transform.position) < distance)
{
anim.enabled = true;
particles.SetActive(true);
}

So when the player flies close to the flower, both the animation and the particles are enabled. The flower blooms and remains that way (because the loop option is off).

For some polishing, I used the colorize option in GIMP to get multi-colored children and flower sprite sheets. Here’s a sample of the flowers.

flowers
Flowers

A tank for the job of a bike (AKA what not to do when coding)

This post is about a spawn algorithm for the light berries in the game. But, in this post, I will be focusing on the things I did wrong, things that should NOT be done. I will mention why I did it, why I shouldn’t have, and what I could have done.

What happened with this algorithm is similar to this: to do the job of a bike, I tried to build a tank. And to build a tank, I started by building a piece of the tank, which then gets destroyed to remake the proper piece, instead of, well, building a tank from the start. Or even better, build a bike, which was all that was necessary. Oh, and, the result of the whole process wasn’t a good tank, it was one with a gigantic hole in it! So, yea, generally not a good idea to do this.

So here’s what I did. I made an algorithm that stores all the spawn points of the berries in Vector3 (Vector3 because it is required for the instantiate function) with z co-ordinates set to 0 (because it’s a 2D game). Then, I add these to a list. Each time a berry spawns, that point is removed from the list (did I mention how awesome the lists in Unity are?). Each time a berry gets picked, the co-ordinates gets re-added to the list. This time, the list is public static, so it can be accessed and edited from other functions. Static can be used here because there is only need for one list of berry positions. The berry respawn timer and maximum number that can spawn at a time can be changed through Unity with a public editor. While this seems like a simple way to do it, there are several problems with it. Mainly, all the values are hard-coded. So others (even programmers, since they are unfamiliar with my code) will have trouble editing it. But more importantly, any edits to the map, from a tree being moved 0.1 units to a new enemy being added, will most probably make the code unusable. The berry would spawn in the wrong position! Which actually did happen. Twice. I had to find and hard-code 15 to 20 berries, about three times! Now that’s inefficient.

So what I did to ‘fix’ this, is make a new prefab berry sprite (with all the scripts from the berry removed) and a different tag on it. These berries would be scanned for at the start for their positions. The positions get added to the list and the berries would be destroyed. The new prefab was because I didn’t want the actual berries in the scene at start (they had scripts on them) and then randomly destroy and re-add them. So what did I do wrong. For starters, if you are going to have a script manager with a script that searches for different objects in the game, do not put Destroy(this.gameObject); there, it will destroy the script manager itself. I repeat, do NOT destroy the script manager, it could be really bad for the game (and cause potential calls from annoyed team members who can’t figure out why the game  suddenly has an instant win condition)!

What should I have done here? Well for one thing, NOT DELETE THE SCRIPT MANAGER. Use the correct object from the iterator in the list, such as Destroy(berryPoint.gameObject); instead of Destroy(this.gameObject);. For another, I should have realized that the berry prefabs could in fact be added from the start with very little re-factoring. They didn’t even need to be deleted, they would just remain there until they are picked or broken, at which time they will be added correctly to the list. The scripts on the berries probably would not have interfered with anything either!

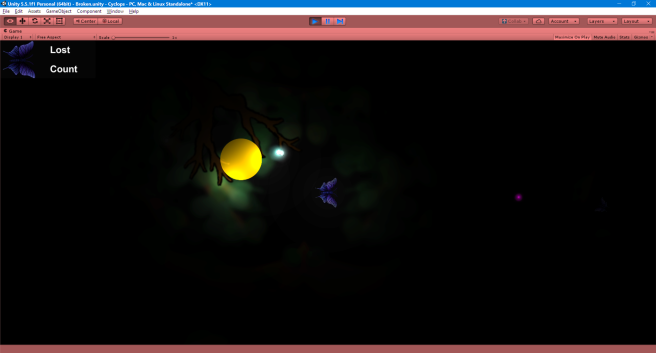
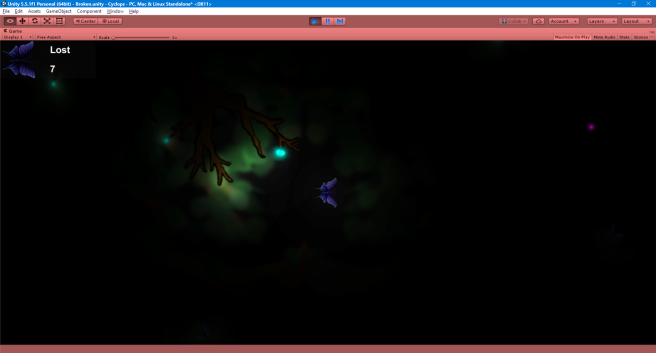
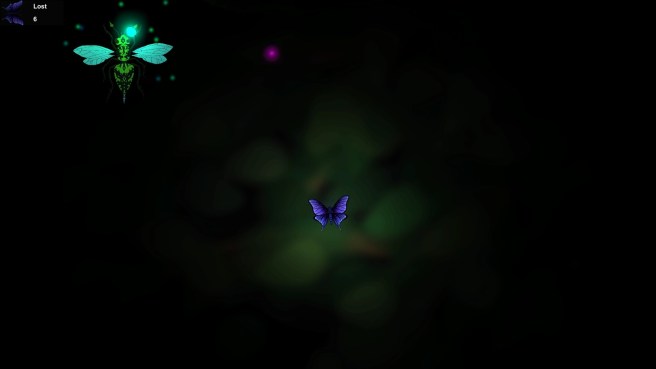
The pictures below show what the game looked like before and after the errors were fixed. The golden circle is the what you fly into to finish the game, and it should only spawn after all the children (the count should be displayed in the UI) have been found. But all these and more were controlled by the script manager which got deleted (I feel like I keep coming back to this one) by the broken code.

broken
What it actually looked like
working
What it should have looked like

So, to conclude, even though a series of temporary fixes can get things done, it might eventually lead to an inefficient code. While sometimes these are necessary, it is usually better to try to make the best code for the situation from the start (if possible), and at each modification. Don’t make a tank where a bike is enough and most assuredly, don’t make a tank which blows up in your face.

Targeting Algorithm for Hunter Enemy

One of the more important pieces of code I did this week is the hunter’s targeting (aggro) algorithm. The hunter is the first enemy we made (and the only one so far), and what it did earlier was chase the player character if it gets too close. But we wanted to expand on this and make it chase other targets too, based on a priority system.

Our other programmer, Sebastian was the one who initially coded the hunter movement and I didn’t want to mess up his code. So I implemented the targeting system in a way that it doesn’t alter his much. I did this by making two functions, invoked one after the other in every update loop of the hunter’s code. The first one generates a list of all targets in the nearby area and the second one decides which the hunter should follow, based on the priority system. Once this was done, all I had to do was replace the target from Sebastian’s code with the new one calculated by the two functions. Or in simpler terms, point the hunter to a new target! The two functions look like this.

void generateList()
{
targets.Clear();

targets.Add(GameObject.FindGameObjectWithTag("Player"));

GameObject[] berries = GameObject.FindGameObjectsWithTag("Berry");
GameObject[] child = GameObject.FindGameObjectsWithTag("Child");

if (berries.Length > 0)
{
foreach (GameObject entity in berries)
{
if (
(entity.GetComponent<powerUp>().currentState != powerUp.State.notPickedUp)
&& ((Vector3.Distance(entity.transform.position, transform.position)) < aggroDistance) ) { targets.Add(entity); } } } if (child.Length > 0)
{
foreach (GameObject entity in child)
{
if ((Vector3.Distance(entity.transform.position, transform.position)) < aggroDistance)
{
targets.Add(entity);
}
}
}
}
void setTarget()
{
foreach (GameObject prey in targets)
{
if (hunterTarget != null)
{
if (prey.tag == hunterTarget.tag)
{
if ((Vector3.Distance(prey.transform.position, transform.position)) < (Vector3.Distance(hunterTarget.transform.position, transform.position)))
{
hunterTarget = prey;
}
}

else if (prey.tag == "Berry")
{
hunterTarget = prey;
}
else if (prey.tag == "Child" && hunterTarget.tag != "Berry")
{
hunterTarget = prey;
}
else if (prey.tag == "Player" && (hunterTarget.tag != "Child" && hunterTarget.tag != "Berry"))
{
hunterTarget = prey;
}
}
else
{
hunterTarget = GameObject.FindGameObjectWithTag("Player");
}

}
}

Now, before I go into detail about the code, I would like to mention one thing. The list container in C#/Unity is awesome. It is easy to use and makes life easier! Why? Because of easy creation, iteration and element removal. The removal especially, because it can be done by specific element, rather than specific index (specific index is possible as well)! That said, I should also mention that I ran into some problems with it. For one thing, I had trouble adding elements to the list from a different script (even thought it was public static at the time) with this.gameObject (I have no idea why and if anyone knows, please let me know). For another, some of the objects actually get deleted through the course of the game, which leaves the hunter with a null target (the hunter either stood still or started moving erratically following this). The null target throws an exception as well. However, I did manage to fix this by adding an if statement to check for null targets and assign a temporary one when it happens.

Anyway, here’s how the code works. First, it adds the player to the list of targets. Then it scans the scene for all berries and children and adds them to the list if they are within the aggro radius defined by Sebastian. Berries are only added if they are not in notPickedUp state (see my previous blog post for details). The hunter script then sorts through the list and finds the target for the hunter to chase, based on the priority system. The priority goes: closer target of same type as current target > berry > children > player (as suggested by our designer). The target gets reset to the player if the hunter’s current target is destroyed. This is temporary and gets changed very quickly because both the list creation function and the target pick function are called each update. Once the target is picked, Sebastian’s code takes over and moves the hunter accordingly.

hunter-aggro
Light berry being used as a distraction

I also want to mention the list itself that I used to store the target GameObjects. It is currently declared as follows.

private List<GameObject> targets;

As I mentioned earlier, this was a public static variable at start (in fact, it was coded that way till I noticed something while writing this post). If it is public, any other function can edit it. Now, this was the original intended functionality, but I wasn’t able to implement it so it makes sense to have it as private, away from easy (unwanted) modifications. But I also removed the static part from it. Why was it there in the first place? Why did I remove it? Well the first one is simple. To make it easier to add and remove elements through other scripts. I wanted to add and remove berries and children to the list as they spawn (or get destroyed), directly from their behavior scripts. But then why remove it? This is because of an over-sight that would break the hunter behavior itself. If it were static, all hunters would have the same list. But they might have different targets nearby, so they may not follow the right one! For instance, one hunter may have the player nearby while another, a child. If both pairs are out of each others’ ranges, the function will still only calculate one target for both of them (the child because of the priority list)! And only one of the hunters will chase the target because the other one doesn’t have a target in range!

And here’s a video of the code in action.

Lighting System

One of the most core elements of our game is the lighting, as such, this post is about how we managed to implement it, and the part I’ve done in getting it working. This is how the lighting system currently works, although we plan to refine it a bit more later on.

The concept “Echo” requires a dark map where the player navigates around and finds stuff. To implement this in any way, a lighting system is necessary. We decided to do this by attaching a light source (controlled by scripts) to a berry, which the player can then pick up, carry around or throw. A problem here is that the 2D sprites don’t interact with lights, and you have to have a sprite diffuse shader on them for them to do so. The different states of the berry were implemented by my fellow programmer, Sebastian, through an internal state machine. I then coded the behaviour of those states: ‘not picked up’, ‘picked up’, ‘thrown’ and ‘broken’.

Starting State
At initialisation, the berry is set to ‘not picked up’. The code


if ((Vector3.Distance(target.position, transform.position) < distance) && ammo == false)
{
     currentState = State.pickedUp;
     ammo=true;
}

checks if the player is near the berry (with no ammo) and if they are, changes state to picked up. It is implemented like this and not through onCollision, because we didn’t want the berry to collide with the player and trigger the corresponding physics behaviors (like pushing the player off or dragging the player down). The player and berry are also on separate non-colliding layers.

notpicked
Not Picked Up State

Picked State
If the player gets close to the berry, it goes into ‘picked up’ state. The berries position now gets constantly updated to a point in front of the player by using a public transform that stores an empty (child) object in front of the player. The child object is just for convenience, since it can be re-positioned easily. The collider of the berry is disabled, to avoid the possibility of using the berry as a shield against the hunters. The light intensity and range are increased.

picked
Picked Up State

Thrown State
Once picked, the berry can be either thrown (towards the mouse cursor) or dropped. If the berry is thrown, it transitions to ‘thrown’ state and then to ‘broken’ state. If it is dropped, it immediately goes into ‘broken’ state. Since Sebastian did the code for the throw, I will not be going into the details of that.

thrown
Thrown State

Broken State
Once in the broken state, the berry’s light intensity is set to max, while the range increases at first, and then decreases to zero. The increasing and then decreasing is to create an effect like a flash of light illuminating the map before it goes out. At range zero, the object is destroyed (for not wasting memory). The code for this is as follows.


m_light.intensity = 8;

if (isIncreasing == true)
{
     m_light.range += 5f;
     if (m_light.range > 100)
     {
           isIncreasing = false;
     }
}
else if (isIncreasing == false)
{
     m_light.range -= 0.5f;
}

if (m_light.range <= 0)
{
     Destroy(this.gameObject);
}

fading
Broken State